
We’ve all used Google Images to search images we’re looking for. We only need to input the keyboard and obtain the desired outcome. However, a reverse image option allows you to obtain all of the details of the submitted image. So, here’s how to reverse image search on an iPhone. You may use the reverse image function to learn about the origin and comparable images or double-check the submitted image’s facts. There are different ways to perform a reverse image search on an iPhone. Let’s take a look at them one by one.
Best 2 Ways to Reverse Image Search on iPhone
The majority of iPhone users utilize two browsers: Safari and Google Chrome. Given this, here is a step-by-step guide for performing a reverse image search on iPhone using Safari and Google Chrome.
Reverse Image Search On Safari Browser
1 – Launch Safari on your iPhone and visit images.google.com.
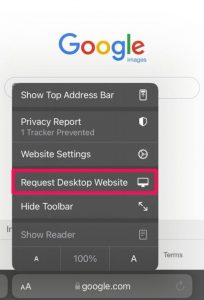
2 – Tap the Control Centre icon in the address bar, and select Request Desktop Website from the context menu.
3 – Select the camera icon.
4 – Paste the URL of the image you wish to explore into the supplied box. If the image is already saved in your gallery, select the Upload an image option.

That’s all. In the next window, you’ll see all the information about the image.
Reverse Image Search On Google Chrome iPhone
The procedure is nearly the same for Google Chrome; here are the steps.
1 – Open Chrome on your iPhone.
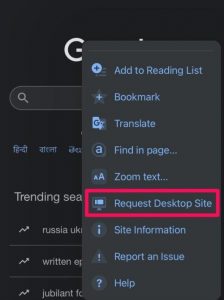
2 – Select Request Desktop Site from the three dots in the bottom right corner.
3 – Go to images.google.com now.
4 – Click the camera icon to either Upload the URL or the image itself.
In the next window, you will view the image’s accessible information.
Also, Take A Look At:
Conclusion:
That concludes this guide. If you’ve any problems, please let us know in the comments. If you have any opinions on How to Reverse Image Search on iPhone? Leave them in the comments section below.