
Are you Looking how to Clear the Cache in BlueStacks on PC? While Windows 11 natively supports Android apps, they must be downloaded from the Amazon App store, which is currently only available in the United States. Therefore, if you live outside the United States, you must rely on Alternate methods for running Android apps on your Windows 11 PC.
There are numerous Android emulators for Windows available. However, if forced to choose the best option among numerous others, we would recommend BlueStacks, the most popular and best Android emulator currently available for Windows and Mac.
Without worrying about compatibility, virtualization, or anything else, you can effortlessly download and play your favorite apps and games on your Windows 11 PC using the BlueStacks Emulator. BlueStacks, like any other Android emulator, consumes a lot of data, and even after you’ve finished using the Android apps, the emulator retains the cache files. So Today we will teach you how to Clear the Cache in BlueStacks on pc.
Best Ways to Clear Cache in BlueStacks on PC 2022
As a result, once you’ve finished using the emulator, it’s a good idea to clear BlueStacks’ data and cache. This way, you will be qualified to free up some space on your system’s storage. As a result, in this article, we’ll walk you through the process of clearing the cache and data on BlueStacks for Windows. Let us proceed to the checkout.
1: Clear Cache of Google Play Services
Because we will be downloading apps and games from the Google Play Store via BlueStacks, you need first clear the cache of Google Play Services. This article will demonstrate How to clear the cache of Google Play Services.
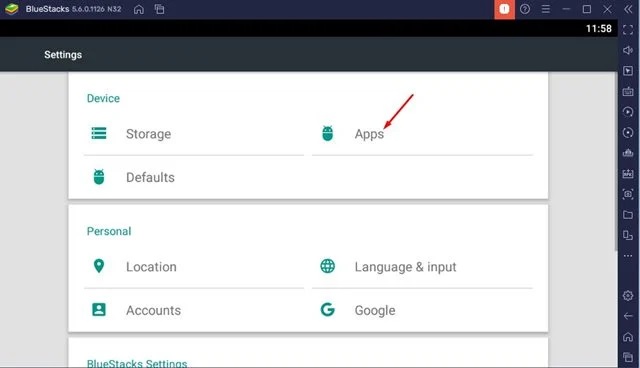
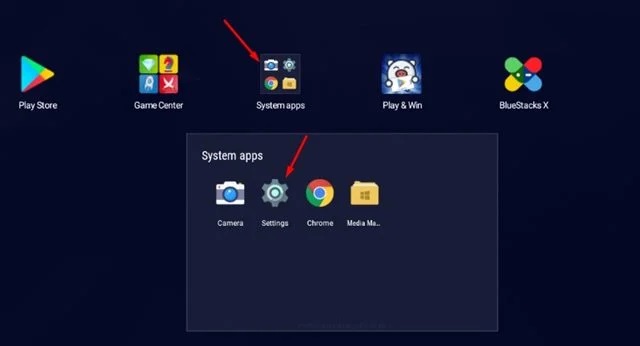
1. To begin, launch BlueStacks on your PC and navigate to the System Apps folder. Following that, click on Settings.

2. In the Settings app, navigate to the Apps section.
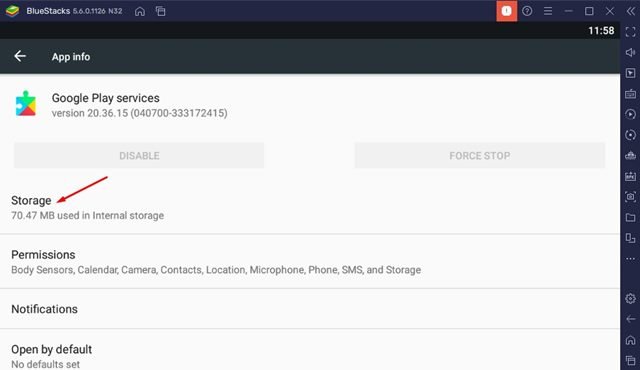
3. After that, locate and click Google Play Services. On the subsequent screen, as shown below, click the Storage option.
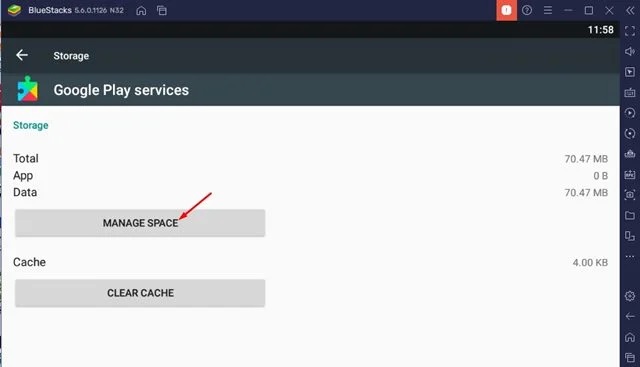
4. Click the Manage Space icon on the Google Play Services storage.
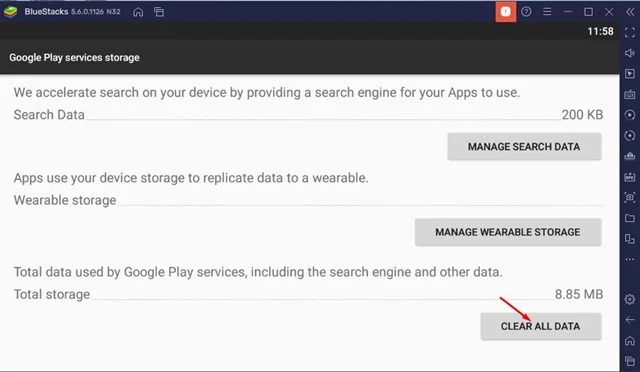
5. On the subsequent screen, as seen below, pick the Clear all data option.
That is all! This will clear the cache and data for Google Play Services on your BlueStacks emulator. You have completed your task.
2: Clear Android Cache Data on BlueStacks
This is another best method to clear the cache data on BlueStacks. This will remove the data & cache of the Settings app of your BlueStacks. Here are some of the very simple steps you need to follow.
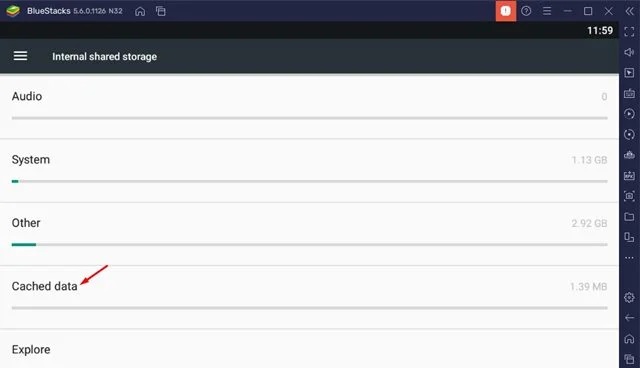
1. First of all, open BlueStacks on your PC and click on the System Apps folder. Next, click on Settings.
2. On the Settings app, then click on the Storage option below.

3. On the Storage screen, then scroll down and click on the Cache Data option.
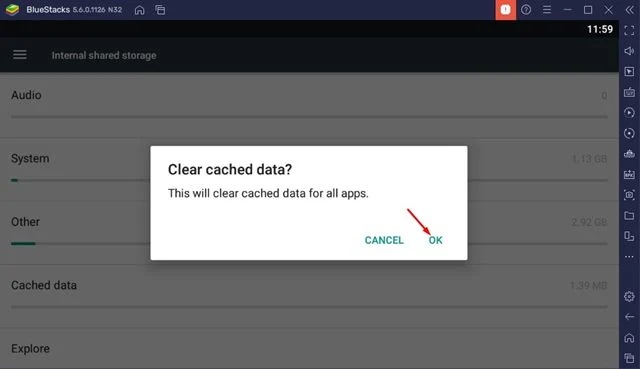
4. On the confirmation prompt, then click on the Ok button.
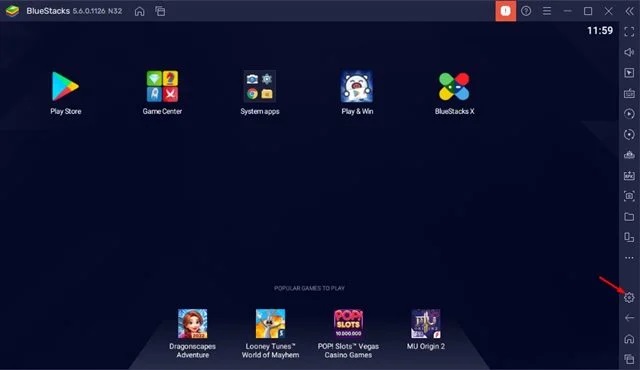
That’s it! You are done. This is another best method to clear the cache in the BlueStacks emulator for PC.
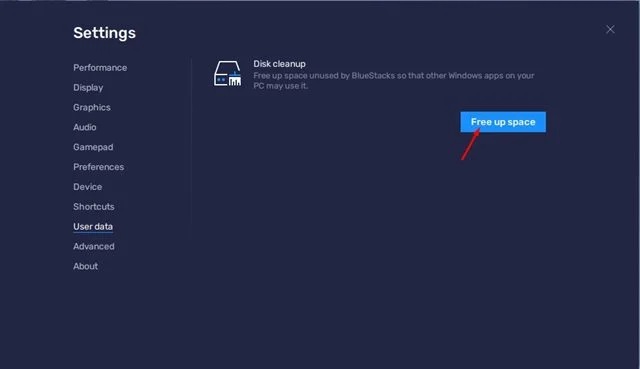
3: Run BlueStacks Disk Cleanup Utility
BlueStacks also has a Disk Cleanup utility that clears the app data & cache files. This will free up some storage space on your device. Here’s how to run BlueStacks’ Disk Cleanup utility.
1. First of all, open the BlueStacks emulator on your PC and click on the small gear icon below.
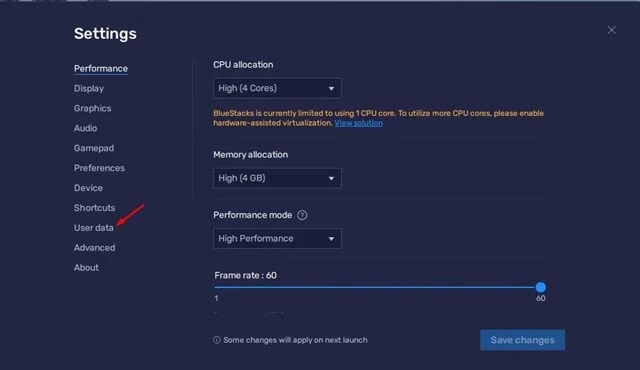
2. On the Settings page, click on the User data option.
3. Click on the Free up Space under the Disk Cleanup on the right side.
4. On the confirmation prompt, click on the Continue button.
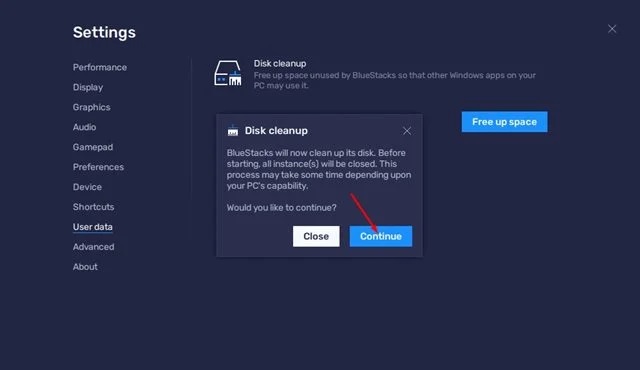
That’s it! You are done. Now BlueStack will shut down and clean up its files to free up some storage space.
Final Words:
It’s pretty easy to clear the cache in BlueStacks for PC. You can use these three methods to free up storage space on your Windows 11. I hope this article helped you! Please share it with your friends also. So, If you have any mistrusts about this, let us know in the comment box below.