
If you’ve been using Windows for a while, you’re probably aware that the operating system enables you to Create System Restore Point. If you’re unfamiliar, restore points allow you to easily restore Windows to a prior version. This is a convenient function, and you may establish an unlimited number of restore points on your machine. If you’re using Windows 11 beta or development versions, you may want to generate Restore points on a frequent basis.
While Microsoft makes it simple to Create System Restore Points in Windows 11, wouldn’t it be nice to have a context menu option to create a Restore Point? Yes, you may choose to add a ‘Build System Restore’ option to the context menu in Windows 11 to make it simpler to create a system restore point.
Ways to Add ‘Create System Restore Point’ in the Context Menu
Thus, if you’re seeking a means to add the ‘Create System Restore Point’ option to the context menu in Windows 11, you’ve come to the correct place. As a result, today, we’ll share a step-by-step instruction for adding a Create System Restore Point option to Windows 11’s right-click menu.
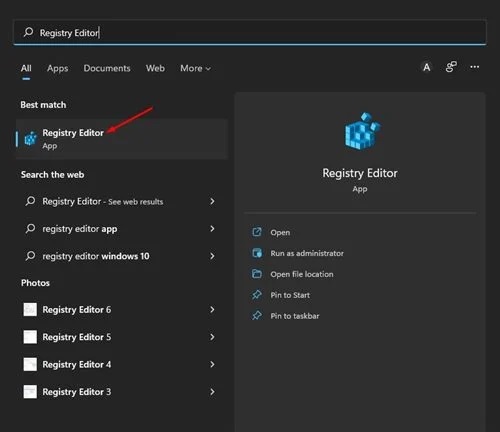
1. To begin, click on the Windows 11 search bar and enter Registry. Following that, click on the Registry Editor application
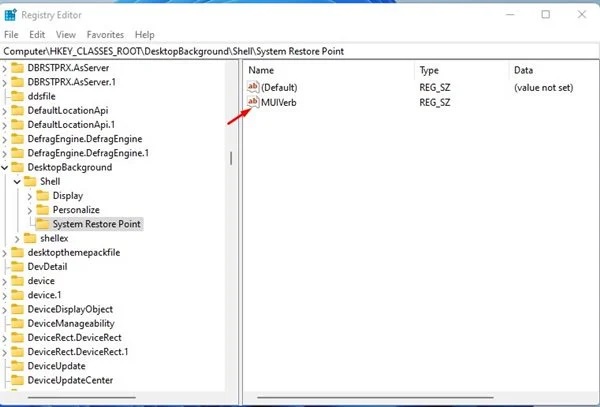
2. On this Registry Editor, you will navigate to the following path:
HKEY_CLASSES_ROOT\DesktopBackground\Shell
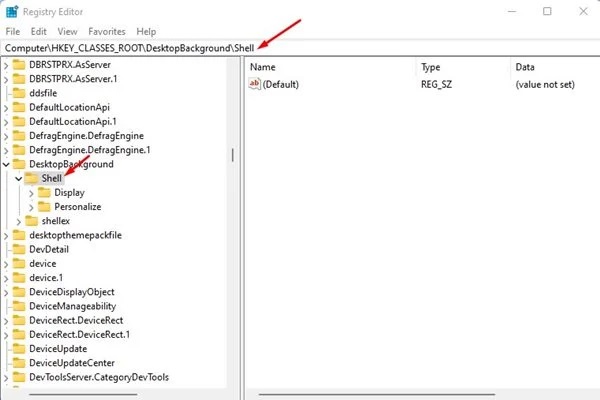
Now As displayed below, you may copy and paste this path into the Address bar.
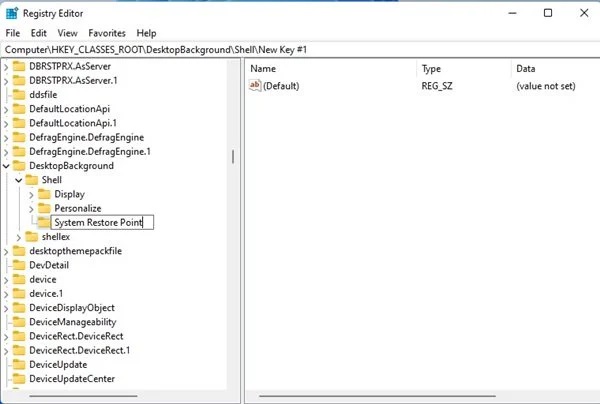
3. Now, right-click on the Shell folder and choose New > Key from the context menu.

4. Give the new key a name such as System Restore Point.
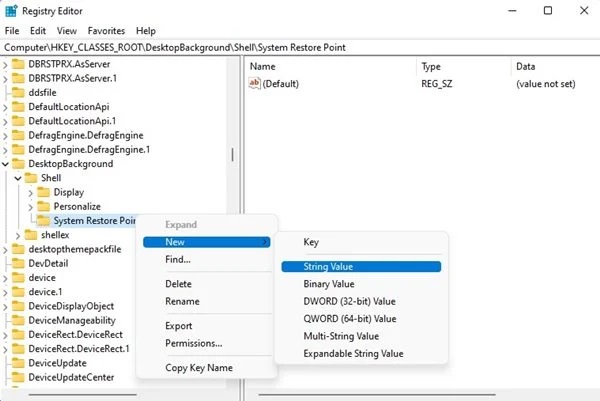
5. Now, right-click the System Restore Point key and choose New > String Value from the context menu.
6. Assign the new String Value the name MUIVerb.
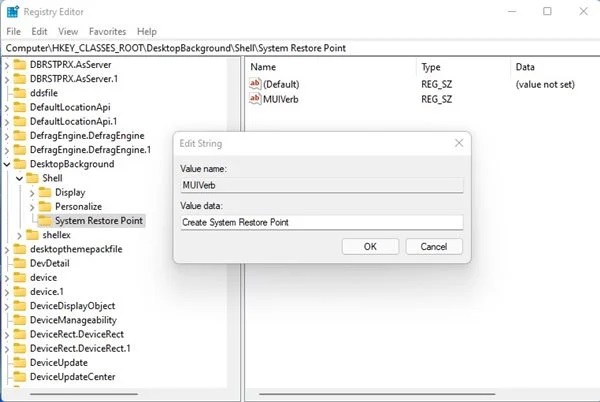
7. Modify the MUIVerb String Value by right-clicking on it in the right pane. Then, in the Value data area, type Create A System Restore Point and click the Ok button.
8. Select New > String Value from the context menu of the System Restore Point key once again.
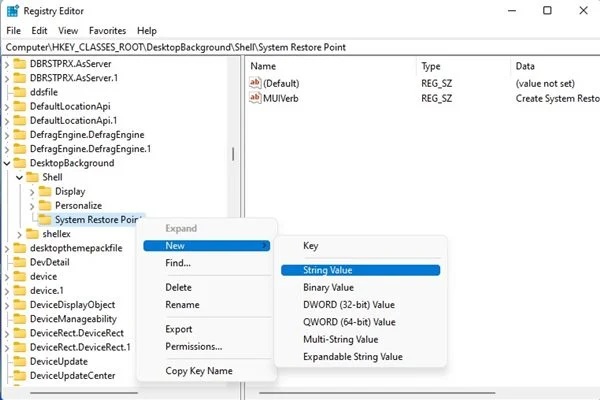
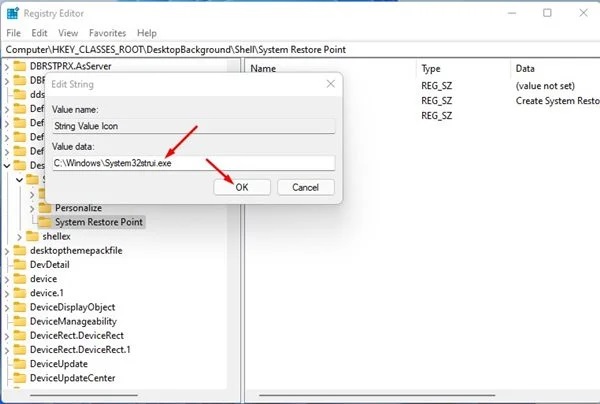
9. Give the new String Value Icon a unique name. Now, right-click the Icon and choose Modify.
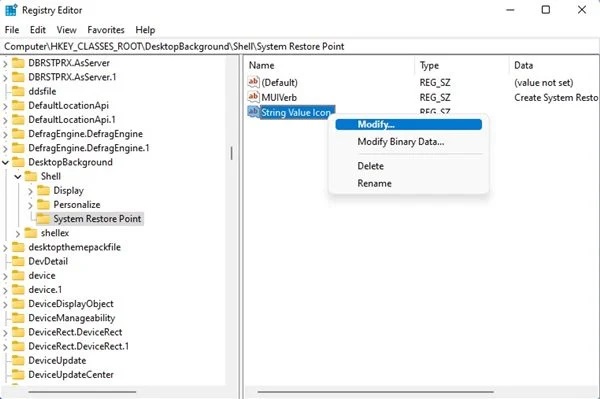
10. Enter now the following text in the Value data area and click the Ok button.
C:\Windows\System32strui.exe
11. Right-click once again on the System Restore Point key and choose New > Key.
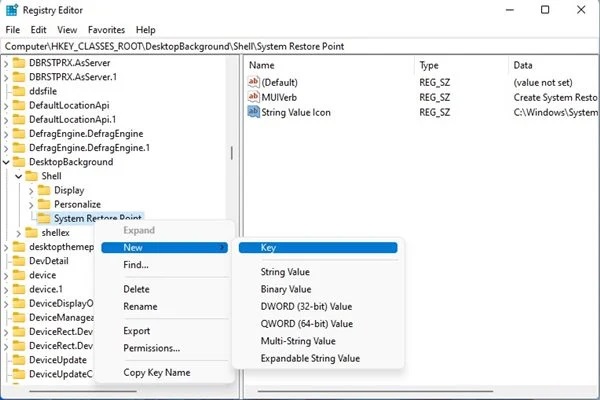
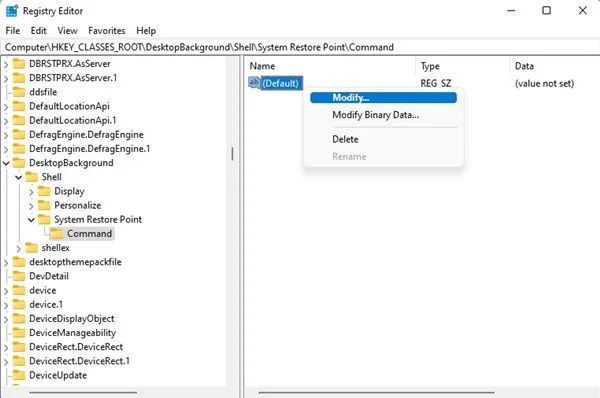
12. Give the new key Command a name. Once complete, right-click and choose to Modify on the Default string value in the right pane.
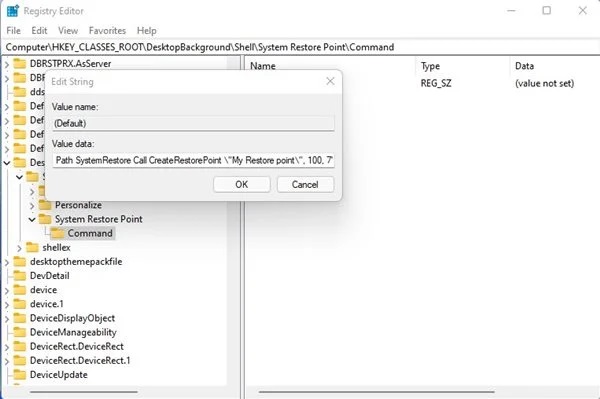
13. Then, in the Value Data area, type the following text and click the Ok button.
powershell.exe -c start -verb runas cmd '/k wmic.exe

/Namespace:\oot\default Path SystemRestore Call CreateRestorePoint \"My

Restore point\", 100, 7'
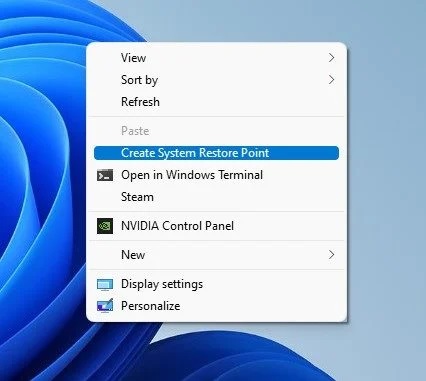
That is all! You have completed your task. Now, right-click anywhere on your desktop’s empty area. You’ll see a new option called Create A System Restore Point.
Also Check : Industrial Robotics Companies In The World
Final Words:
This is a somewhat long procedure, but it is effective. Ensure that you properly follow these procedures. Otherwise, the Create System Restore Point option in the context menu will not function. I hope this information will beneficial to you! Please feel free to share this with your friends as well. If you have any questions, so please leave them in the comment section below.