
FIX – Windows 10 Update Stuck Looking for Updates. It is important to keep Windows updated so your computer runs well and stays safe from hackers and other online threats.
To keep up with cumulative Windows updates, driver updates, or security changes, it’s important to update regularly. But what if Windows 10 gets stuck on the “Checking for Updates” screen, and the process never ends?
You may encounter this issue when you manually try to update your PC. But this issue can happen even when Windows tries to search for updates automatically in the background.
So why does Windows 10 get stuck on Checking for Updates and not move on? This could occur if your internet connection is slow and Windows can’t connect to the servers to discover the latest update.
Other potential causes include an issue with Windows Update Service, incorrect date and time, and an antivirus program on your computer. Let’s talk about what you can do to fix this issue.
Ways to Fix Windows 10 Stuck on Checking for Updates
There may be times when you encounter such issues, even though Windows is getting better every day and Microsoft is working hard to improve the user experience. The troubleshooting steps to fix Windows 10 stuck on checking for updates are listed below.
1. Restart the PC
Restart your computer before moving on to the next troubleshooting step in this article. If a temporary glitch or bug caused this issue, a simple reboot would fix it, and you wouldn’t have to follow the other steps in this article.
2. Check Your Network
This issue is probably caused by slow Internet. You will need to check and troubleshoot your internet speed. Visit SpeedTest or Fast.com to check how Fast.com your network is.

You will need to fix your Internet if it is slow. Switch to another network. If you can’t connect to any other network, switch to the 5GHz band. If you have a router and your PC has an ethernet port, use the ethernet cable to connect your PC to the router.
3. Change the Date and Time
The issue could be brought on by an incorrect date and time on your PC. Set the right date and time to fix the issue you’ve been facing.
- Right-click on the clock on the desktop and then click on Adjust Date and Time.
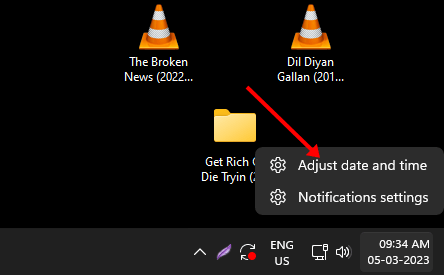
- Set Time Automatically should be turned on with the toggle.
4. Turn Off Updates for Microsoft Products
If Windows 10 is stuck checking for updates, you can turn off updates for Microsoft products. Follow the below steps to do so:
- From the Start Menu, click on Settings.
- Here, click on Update & Security, and then click on Advanced Options.

- Turn off the toggle for Welcome updates for other Microsoft products when you update Windows in the Update Options section.
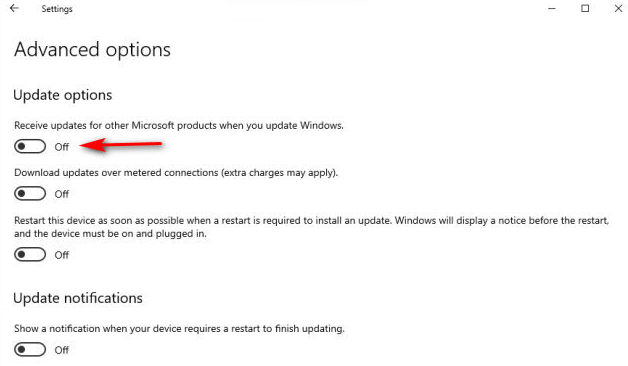
- To save the changes, restart your PC.
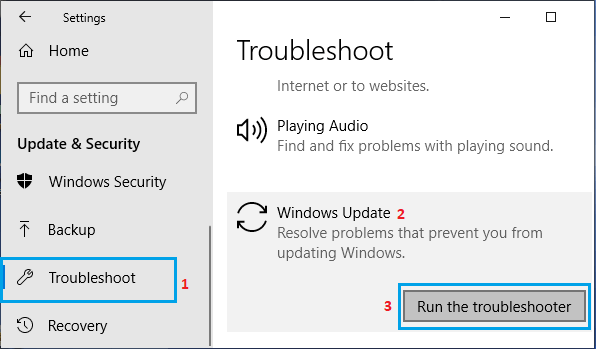
5. Run Windows Update Troubleshooter
If you still face this issue, try running the Windows Update Troubleshooter. Follow the below steps to do so:
- To open Settings, press the Windows + I keys together.
- Click Update & Security right now.
- Click Troubleshoot in the left-hand menu.
- Connect on Windows Update, and then click on Run the troubleshooter.
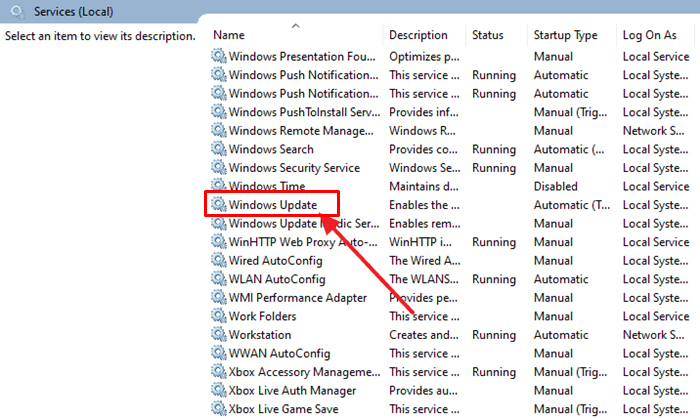
6. Restart Windows Update Service
That could be the issue if Windows Update Service isn’t working right. Observe the steps below to restart the Windows Update Service.
- Push the Windows key, then type Services and press the Enter key.
- Find Windows Update, right-click on it, then click the Restart button.
7. Disable Antivirus
If Windows 10 is stuck on checking for updates, you can turn off Windows Security. To do this, you can follow the steps below:
- Extend the Start menu, search for “Windows Security,” and then open it.
- Now, click on Virus & threat prevention, and then click on Manage Settings.
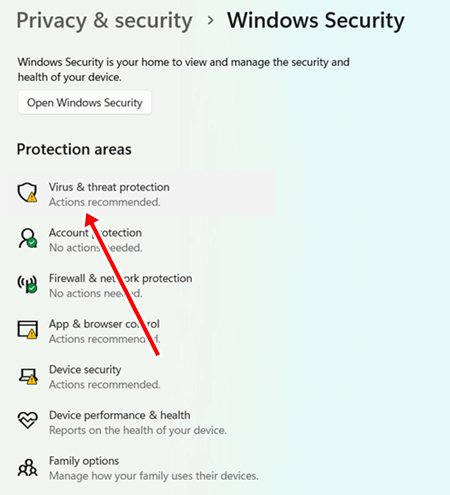
3. Here, you can turn off Real-time security.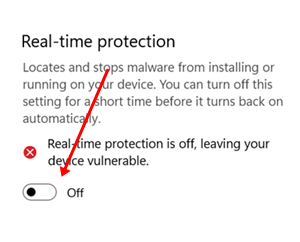
Note- If you have a third-party antivirus program loaded, turn it off or remove it.
8. Update Windows 10 from the ISO
Last, you can use the ISO to update Windows 10 if nothing else works. Follow the steps below to learn how to update Windows 10 from the ISO file.
- You will head to the official Windows 10 ISO download page if you click this link.
- Choose the version of Windows 10 you want to download from the drop-down choice under Select Edition, then click Confirm.
- Next, you have to select the language of the product. When you’re done, click Confirm to move on to the next head.
- You will now see two download buttons: one for 32-bit and one for 64-bit. Choose any download that works with how your computer is set up.
- Open File Explorer by hitting the Windows + E keyboard shortcut and head to where the file is saved after downloading the ISO.
- Right-click on the ISO file and then connect Mount.
- Back on the main screen of File Explorer, double-click on the Windows 10 ISO you just mounted to open it.
- Double-click the Setup.exe file to run it, then click Yes when UAC asks.
- Check the “I want to help make the installation of Windows better” box in the Windows 10 installation screen, then click the Next button.
- To get the End User License Agreement, click the Accept button.
- Preparing the installation will take some time. Click Change What to Keep when the
- Ready to Install window opens.
- Click Next after choosing to keep personal files and apps.
Wait for the process to finish, and then sign into your account when your PC returns.
Final Words
Observe the above steps to fix the issue if Windows 10 is stuck while checking for updates. This is a common issue that can be encountered on Windows, and if you need help updating Windows, this article should help. If none helps, you can use the ISO file to update Windows 10.